From Kevin R:
I received the kit in the mail on Tuesday, January 21. Bobby has made videos for each step of the process. I had already watched most of them in advance of actually having the kit in my hands. As I progressed thru the steps I would watch the video about the next step so I was always ready to move on. Let me say that Bobby has spent a large amount of time doing these videos. They are very well done and contain lots of tips and information. If ever you have a question he was always quick to provide an answer. I can’t say enough good things about the completeness of this kit, the quality of the materials, and the video instructions.
When the kit arrived I pretty much just unpacked it and checked to see that everything was there. I got started almost right away. I built the kit in my kitchen/dining room area of my house. I don’t have a work shop or very many tools. I won’t go thru every step, but I will explain some things. Bobby divides the steps into 20 steps. Sometimes a step required multiple things, but they were basically repeating a process. None of them took too long to complete. I started building the dulcimore on January 21, and just played my first song on it today, February 1. Not quite 2 weeks. I had started out with good intentions of recording exactly how much time I spent on building it, but didn’t follow thru. Looking back, I did make a close estimate of the time I spent on each step. All together, from unpacking to playing a tune I spent approximately 12-14 hours of time, a little each night. Of course, a lot of time was used waiting for glue to dry. That wait time is not included in my estimate.
Some things I recommend for anyone (like me) who has not done anything like this before:
1. If you don’t have about 15 clamps to use…pay the extra money for the sewer pipe clamps. Bobby will make them for you. They are so easy to use and really don’t cost much at all. I got them, but I did use a hot melt glue gun to glue small pieces of felt on the tips so they wouldn’t scratch the wood or leave dents.
2. Watch, and re-watch Bobby’s videos. Lots of good stuff in there.
3. If you have some basic tools you can get thru this process. It isn’t extremely hard.
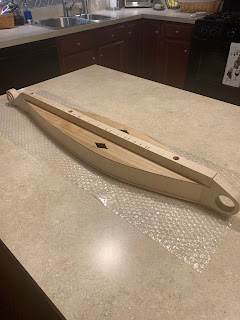
4. For me, the hardest part was cutting the sound holes. I used a razor blade knife. You have to go slow because you don’t want to slip and put a big gouge in the wood, or worse yet…cut yourself. I chose to use the diamond shape with concave sides that Bobby usually uses. In hindsight I would just do a straight sided diamond. It would be easier to cut out. Unless you have access to a scroll saw or some other kind of saw you could use to cut them out. The largest amount of time spent on 1 step was on these sound holes.
5. Sanding - The second largest amount of time spent on 1 step. I could have spent more time on it, but I am impatient and I figured I am not building a show piece so sometimes good enough is good enough. Be aware…doing this in your dining room will make a mess. A BIG mess. Lots of dust. It looks like flour and coats everything. It does clean up easily, but your wife might not like it. haha
Now that it is finished and strung up. I decided to wait about a week or so and go back to apply a coat of wax to it. It looks good, but also looks like it could use the wax. I will re-string it then.
I want to encourage anyone who might want to try to build one of these kits to just go for it. To me, it was a fun and worthwhile project. It isn’t that hard. Just take your time and do a little at a time.
To Bobby, thank you for all your hard work in making this kit so complete. From your instructional videos, to the quality of the parts included. Everything was great. I had a blast and I think I got a pretty nice dulcimore out of it. I couldn’t be more happy.
Here's a sound sample of Kevin's finished Hogfiddle:
https://soundcloud.com/user-888811516/angelina-baker
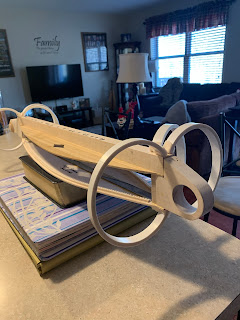
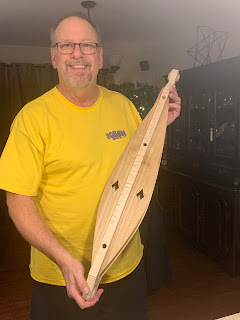
And some photos from his build as well as the finished Hogfiddle:


No comments:
Post a Comment